Wednesday, 16 December 2015
Wednesday, 4 November 2015
Initial Ideas
There are three main concepts that I have in mind, all of which are similar variations on the same basic concept. They all revolve around the same plot with separate endings, some of which are similar and some which have more of a plot and character development.
The first story concept has three robotic protagonists, rusting and quickly running out of power, attempting to locate anything that will power them for longer to keep them alive. when their scanner begins to pick up a signal, they go to investigate it, and they find a battery there. The antagonist then steals this and they must retrieve it from him. This version of the short film would end in the antagonist being ripped apart by the protagonists, having grabbed onto him, while he flies around and attempts to get away, eventually crashing into the ground and shutting down. This version was rejected due to the ending being a bit disturbing, as well as seeing the antagonist literally ripped limb from limb by the protagonists would change the audience's view on whether they supported the protagonists or not.
The second concept has similar story, but some minor changes and a different ending. This concept has three robotic protagonists who are being hunted by a larger robot, styled and designed to look like a form of snake. The short film would open with a fight between them, and the antagonist would then steal all of the spare power they have. This would be what prompts them to follow the scanner and look for the battery, which the secondary antagonist steals. when they go to get it back, during the final fight, the snake reappears and the protagonists begin to panic. after one of them is killed by the main antagonist, the secondary antagonist decides to help them seeing the real danger that they face, and aids in the destruction of the main antagonist. He then helps the protagonists repair their broken friend. This version is by far the most in depth, and has better story and character development then the other ideas. However, it would also be by far too long, as the estimated run time of this would be around 10 minutes in order to use all of the camera work and techniques that I wanted too,while keeping the better plot development.
The final concept is a simplified version of the previous concepts. The film has three robotic protagonists who are on the search for more power before they run out. Following their scanner, they find a cave with a frozen door that they break through using a form of laser. Inside, they find crystals that will power them for a short while, and then a gigantic battery. the antagonist, who has been observing them, makes his move and strikes one of the protagonists down, before stealing the battery. the main protagonist hangs on to the battery as the antagonist tries to steal it, and the antagonist flies up into space in an attempt to make him let go. When he is forced off the battery, he comes crashing back to earth. When he lands, they use the scanner to find where the antagonist is located and charge into his lair. He attacks them, and they collectively try to use their lasers to destroy him. However, he manages to get one of the protagonists, and rips his arm off, using said arm to beat him to death. The other protagonists, seeing this, again use their lasers, but use them to push him over the ledge of the cave they are in and into a pit of lava, where he melts into molten metal. They take their battery and fallen friend and leave. This idea provides a good balance between the two previous ideas, taking the best of both elements and instead using the character development to further develop the audience's anger towards the antagonist.
Wednesday, 28 October 2015
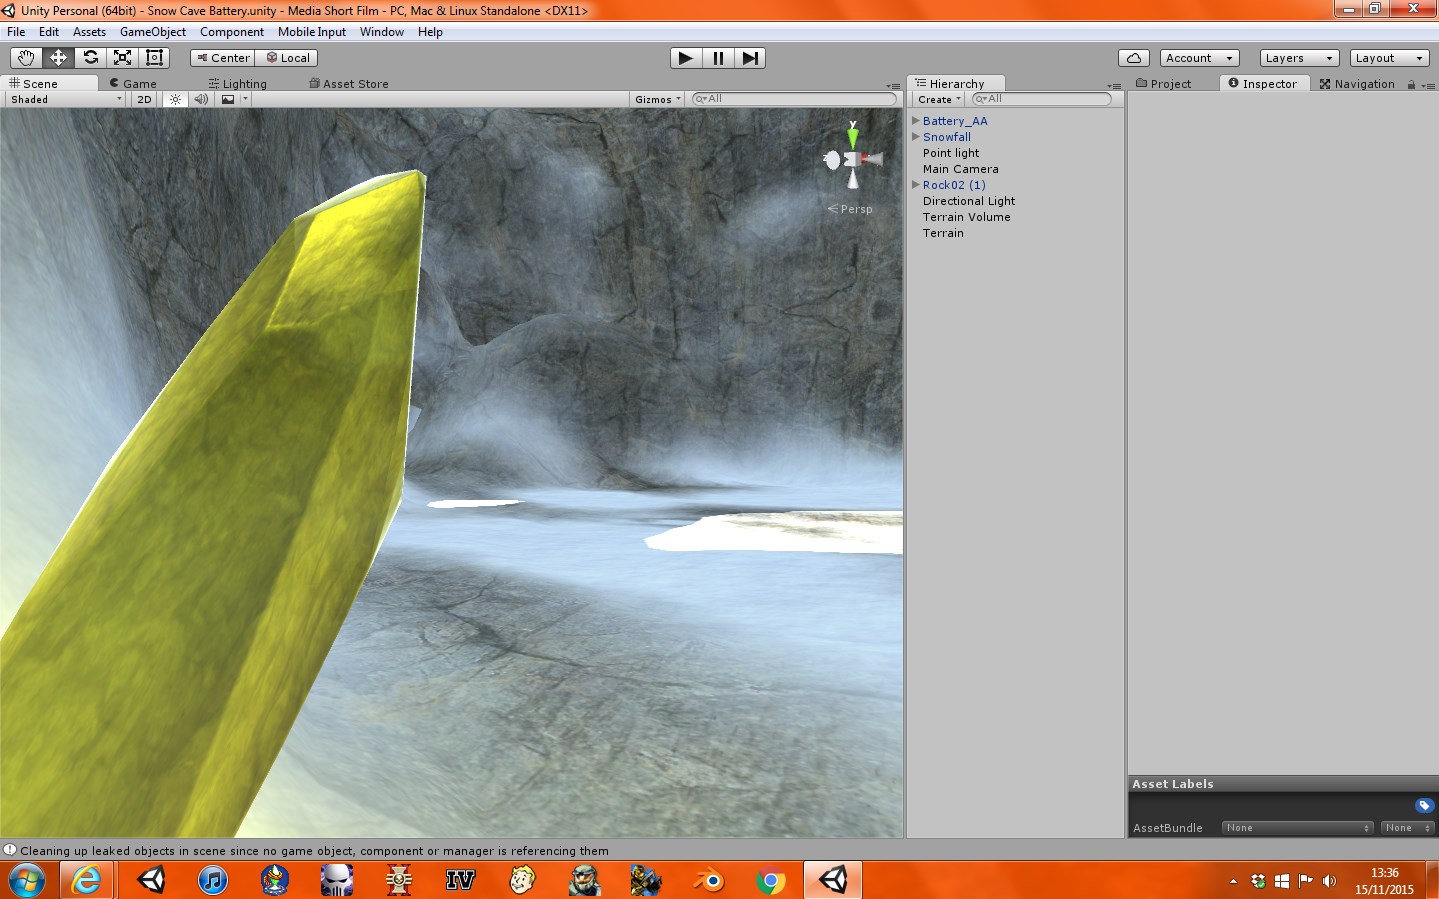
First shot of the battery/cavern scene (Which had it's set displayed), and first shot of the short film that has been recorded!
Today I have begun animating the introduction shots to the battery/cavern scene, and have recorded the first shot of this scene. it begins with a pan down, which will be used as a transition from the previous shot, to the three protagonists arriving at the cavern's entrance. The raw footage from this, recorded straight from the engine and unedited, is shown below. The shot uses a looped animation, which is why it appears to play multiple times.
The reason this was recorded with more then one loop is that the particle effect that generates the falling snow is randomly generated as to where and how it will fall, so having three different loops allows a choice to choose the best one to transition from the first scene. initially, the footage displays a grey screen saying "scene is missing a full screen camera", which means that no rendering camera is present. this is so that the animation is not looping before the particle effect has begin to generate, and the animation only plays when the 'e' key is pressed on the key board, using a small custom script I wrote in order to control the particles. While I was hoping to record the entire film in 60 frames per second, this seems to be an impossible feat with my current equipment, and the film will likely have to be recorded in 30 frames per second.

The reason this was recorded with more then one loop is that the particle effect that generates the falling snow is randomly generated as to where and how it will fall, so having three different loops allows a choice to choose the best one to transition from the first scene. initially, the footage displays a grey screen saying "scene is missing a full screen camera", which means that no rendering camera is present. this is so that the animation is not looping before the particle effect has begin to generate, and the animation only plays when the 'e' key is pressed on the key board, using a small custom script I wrote in order to control the particles. While I was hoping to record the entire film in 60 frames per second, this seems to be an impossible feat with my current equipment, and the film will likely have to be recorded in 30 frames per second.

The custom script to activate the camera's recording
The first shot recorded of the short film
Wednesday, 21 October 2015
With the Box-bots having finished being textured, They needed a way for them to be identified separately. I tried many different ideas, but eventually settled on the idea of having them painted different colours, along with different eye colours. This is done in order to make them identifiable in both long shots and close up shots, especially if it shows only the eyes.

The base texture for the Box-bot. This provides the basis for all of the coloured bots.

The base Box-bot texture applied to the robot. As you can see, it appears colourless and bland.

The edited version of the basic texture to add a blue paintwork to some sections of the bodywork. This was done in Photoshop in order to allow me to create the different colours easier later.


The final product for the blue bot, who will be the main protagonist. note how his paint job only covers panels and crosses no faces - this is done because of the rust and scratches that exists there, making it unlikely that any paint would have survived.

The texture for the body of the orange bot. The paint job is identical, and only a hue change is used on the painted parts to keep the rust the correct colour.

The completed set of protagonists, each with different paint and eye colours. Their colours are chosen to be easily distinguishable from a distance, as well as to stand out from the background.
Wednesday, 14 October 2015
Battery Cavern Modeled, Environment and Camera Effect Testing
I have been modelling the different parts of the environmental scenes that need making, however, I have finally finished the cavern that will have the battery in it. Alongside this, the battery has been finished and has therefore been implemented into the scene. Here are some images of the different parts of the environment:


To demonstrate how this scene will actually look within the film, I have recorded a 1 minute clip of what the scene will look like with the snow particle effects on. The grass in the background also uses a wind renderer to make it seem as though it is blowing in the wind.

An overview of the environment. The grass does not span round the entire area as not all of it will be seen.

The entrance to the scene. The characters will enter through this arch.

Character's entrance on the left, entrance to the cavern on the left.

View from the inside of the cavern, facing outwards.

The inside of the cavern. The entrance to the small room with the battery is on the right, and one of the lighting crystals is on the left (the crystal is subject to change).
Another shot of the crystal. The crystal is slightly transparent, and the glow has been reduced (it will be brighter when a character approaches it).

The battery room of the cavern. the battery is lodged in snow, and the roof has a hole to allow light to shine on it as well as for the antagonist to escape out of.

Another angle of the battery. This better shows the hole in the roof.
The shots demonstrated here are good, but they are not good enough, as they look rather bland. Therefore, I would like to apply camera effects and changes to the world cameras that the short film will be recorded through. Here is a list of shots taken with in-game cameras:


Here are the same shots, but with camera effects applied. No external editing software (Photoshop, after effects, Sony Vegas etc.) was used for making these images, and were all done in engine. Alongside this, a snow particle effect has been added.


To demonstrate how this scene will actually look within the film, I have recorded a 1 minute clip of what the scene will look like with the snow particle effects on. The grass in the background also uses a wind renderer to make it seem as though it is blowing in the wind.
Wednesday, 7 October 2015
Lights and Lenses - Lighting and Reflection Effects Within the Short Film
Due to the film's unique setting and animated style, I am granted a large amount of freedom with the scenery and sets that I am designing. As it is set on a minute scale, it allows me to explore some of the more vibrant parts of the world, as anything is possible with the 3D animation. so, whereas a live action film would be limited by budget, props, physics and other issues, I am able to move around them to create better looking and more visually appealing sets.
One of the biggest parts of creating 3D sets is the lighting - whereas in real life sets will illuminate naturally with sunlight and such, a 3D set starts out with no light at all. This, while it may seem problematic, allows for a wide variety of different lighting choices and effects to be used, such as the crystals that the protagonists find in the cave they enter. These will not only be used as decoration to split up the rock and add more variety to the scene, but can be used as an incredably flexible lighting source when combined with sunshafts coming through the roof.
As the sun shafts will provide a viable area light source, one which will be used to form a base light source for the cavern, the crystals can be used as additional ones. It is highly likely that these crystal lights will have to be baked onto the caven, as the rendering power to create 10+ point lights with real time shadows attached is a heavy undertaking on rendering. However, when they are baked, point lights with shadows can be overlaid to ensure that they only need to be rendered when they are near enough to the camera. Combined with the use of a depth of field camera effect to defocus the background, this should provide a realistic effect, or as realistic as I can achieve using my computer.
The crystals themselves will likely use a form of custom shader, or will be a heavily customised version of the standard 5.0 specular shader. This will have to allow an object to be transparent, have reflecting surfaces and and have shadows applied all at once. The use of the specular varient of the shader is to allow the crystal to have a shine to it, and as it is the 5.0 shader it will have a world-influenced glow around it, providing it with a realistic effect as though it is actually glowing. The illuminicity will also be raised to give it a glowing-style, which will hopefully reflect on the cavern itself, spreading the effect of the light.
Wednesday, 30 September 2015
Setting and Scenery for the Short Film
The film's setting has been through a numerous amount of different ideas, ranging from deserts to forests, but in the end I decided to settle on a snow-covered setting, based within a forrest. This was chosen because it allowed a good display of particle effects to create the snow, as well as to shorten the camera render distance needed to be activated, as a white-grey fog can be used to cut off far-away sections of the forrest to keep the render load as low as it can be. An effect that I will also attempt to use is an ice effect, to give the impression of cold.
This will be done through various methods, such as icicles, frozen lakes and freezing parts of the main protagonist's body. As real generated physics wil be used throughout the film to make it appear more real, the ice sections will use a setting called an Ice Physic Material Boundary, which allows it to have the physic properties of ice, allowing it to become more slippery to generate a better effect of realism. With this effect applied the animation can be started on, as the majority of the construction of the scene will be complete.
The scene will be set in a small icy valley, with a mainly grassy base and small snowy patches spread around, along with constant snowflakes falling from a particle generator about 30-40 meters in the air (to keep extra particles from being rendered). A grey-white fog will be applied in order to create a better atmosphere and reduce computer stress. The use of this fog will also help to conceal objects that are further away from the action, or that will be used in later scenes but do not want to be on camera yet.
The first scene will take place on a cliff overlooking a valley, which will be used for the opening shot and to allow the correct lighting. This will also be close to the location of the final scene, as a similar lighting effect will be used but at sunset as apposed to the dawn. Using this lighting effect will help to illuminate the places that require it, while baking the entire scene in a light that suitably fits the scene. throughout the short film, the time of day will change as though time is actually passing. this helps add to the story, as the viewer can decode how far through the short film they are based on the lighting, and will add a much nicer orange-pink colour to the final fight at the end, giving the impression that it is the end if they don't win.
Throughout the film, I aim to slowly increase the amount of snow in each scene as well, as though it is realistically setting. This will be done through texturing the areas for each scene (as all of the terrain has to be individually modeled and textures have to be painted no for it to not be its default white) with the appropriate amount of snow. For instance, the first scene will have hardly any snow present, but will have an easily noticeable amount of snow falling, while the end scene will be almost all snow covered with very little to no snow falling.
I aim to create different textures for the protagonists in each scene with an increasing amount of snow on them, however this may not be feasible due to the time this would take (roughly 40 extra textures, on top of the current 5). With this effect in mind, I would like to research if it were someway possible to replicate the effect within my editor, as the editor has an effect called a Projector, which is often used for shadows with a low rendering power. These can be programmed with any texture however, and can project the texture at any angle and position needed, so they may be an alternative.
The use of snow within the scene has other uses besides atmosphere though. Using snow allows for logic reasoning as to why certain parts of the film are as they are, for example why the battery that the group finds is stood on end and hasn't fallen over. In this example, the battery will have snow surrounding it's base with very little of it's bottom side showing, if any. Another example of snow effecting the film in a logical way is that wheel tracks do not have to carry over through scenes, or sometimes even shots. for example, in the first shot there is now snow on the ground and the mud would be frozen, and therefore would not allow for much of the wheel's tracks to show. However, later on in the film, there is snow, which would display the tracks, but as it is still snowing they would be covered fairly quickly. In the final scene, the tracks would stay, as it will hardly be snowing and the ground will be covered with snow.
Some of the sets need to be designed with certain effects in mind. for example, when the mining laser is introduced and used for the first time on the rock wall, it has to make a hole in it for the protagonists to enter through. This will be tricky, as the terrain is usually static and cannot be changed while the program is running (e.g. when the animation is playing). However, my current way around this is to place a temporary destructible rock (one that is intentionally made in pieces, and then wrapped with a rock texture that removes the seems in it) over the entrance, which is a pre-made hole in the rock-wall. This, along with the use of a dust particle effect and smaller particle rocks that would fall down for a little while after the initial rock's destruction, should give a convincing effect of the rock being destroyed, and were this coupled with a glowing yellow/orange texture around the edges of where the rock was, should produce a fairly realistic effect. I can combine this with a shaky cam in order to enhance the desired effect.
Another of the limitations of the default method of creating terrain is that it only allows the terrain to be created going upwards, with overhangs, caves and cliffs being impossible to make. Therefore, I will have to separately code an editor extension that will allow such formations to be made. This will be a large amount of extra work, and will require likely quite a lot of time, so I will try to find alternative methods before creating one from scratch, but I will have to use one either way, as a large amount of the scenes rely on these different formations to create the right lighting and place shadows in the correct places.
However, these will often be combined with other lighting sources, such as the small crystals in the cavern that the group break into with the mining laser. These crystals will be of a variety of colours, and will each emit the appropriate light colour to the crystal. they wil also be spread out through the small cavern, so that the light colours do not mix too much, and the centre of the cavern will be lit from a gap in the roof, allowing sunlight to come through. These crystals will hopefully each project shadows, giving a realistic and unique lighting effect. However, due to limited rendering power, the lights in a scene with real time shadows are going to have to be limited to around 6-7 (not including sun-style light sources) in order to keep it running at above 30 frames per second.
Keeping the frame rate above 30 is important as that is what I aim to record and render the short film as. However, if it is possible without causing too much stress on the computer I would like to record at 60 frames to create a smoother and better quality product. Additionally, it will be recorded in 720p quality, giving it HD quality, something else that must be considered when creating the scene (as the capture program will cause a large amount of additional stress on the computer).
Having a natural looking lighting throughout the film is am important aspect of designing the scene, but what should also be considered is that the program has a bilt in feature that allows a global reflection box (6 textures arranged in a cube formation which is often used to give the impression of sky, similar to a skybox but not seen directly) to be applied to all objects within the scene. This gives a consistent colouring to all objects, including terrain, making the scene look more as though it is intended to fit together and giving everything a similar glow as though reflecting the sky. Using this, I can use one of my high definition space-boxes (similar to a skybox, but covers all faces unlike a skybox which doesn't cover the floor) in order to give the space a realistic effect.
For the earth, I will aim to use a high definition sphere and a large atlas for the texture, as this will give it a good effect. I will them apply a outer halo, which will give the impression of an atmosphere, and make the material a specular, making it glisten with colour (which i will make a light blue to reinforce the atmosphere effect). The camera's pixel bloom effect, which brightens lightly-coloured pixels to the point of looking as though they have a glow around them (an effect that is very helpful for producing lifelike lighting effects) will illuminate the atmosphere effect and make it appear lifelike. Choosing a good space-box colour, such as a cyan or light blue, will give a good effect on the reflection of the earth.
In the final scene of the film, lava will be present and will be taking a vital role in the plot. For this, I will have to create a custom shader in order to make the lava flow and move in a realistic way, and will make a custom boosted version of the pixel bloom to give off a much brighter effect, which will make a more convincing heat effect. The shader should also morph the texture around any colliding objects or meshes to give it a better flowing texture and effect. This will be important for the conclusion of the final battle, where the antagonist is thrown into the lava, as I would prefer the lava actively move around him as he sinks into it.
The lava will also be one of the main lighting sources for the scene, making it an important part of the final scene in terms of design and setting. As it is a crucial part of the plot, It will have to be shown onscreen a couple of times in order to emphasise its importance, so it shouldn't have to be made too bright or it would obstruct the scene. In order to get around this, I will make the rock around the lava and that the scene mostly takes place on a darker colour to contrast against the colourful red/orange/yellow of the lava.
Monday, 28 September 2015
History of Animation
Throughout history, animation has gone through many different styles, methods of production and end results, achieving different effects and using the technology of the time to create unique films that are often very different from each other. The use of different techniques in different films are as a result of both technology constraints as well as visual styles. though animation has been around in the form of flip books and such, these were never used in films and the first major usage was in hand-drawn images.
The first form of animation was the basic flip book, which uses the same concepts as later techniques (such as the cell-based method, which is a more advanced and technical form of the basic flip book concept) but is a more primitive approach to animation and moving image. it uses a form of optical illusion to give the impression of an object moving on the page and being animated, but in reality it is different 'cells' that have been drawn on different pages, and are being moved through with the speed needed to trick the eye into not seeing the individual frames, and instead only viewing the animated image.
Initially, animation in film was hand drawn frame by frame and then the frames were played back to back in order to appear as though they were a moving image. This resulted in a very lengthily production cycle as the entire scene had to be redrawn every single frame, and if one mistake was made the frame would have to be redrawn all over again. However, this did allow for standard films to have animation in them, as the regular footage could be drawn on with the added bonus of not having to draw the background on every frame, reducing the production cycle dramatically.
The next large step in the production of animation was stop motion, which involved taking a fraction of a second's worth of film (essentially an image) of the scene, then moving the character/objects/subject the slightest bit, then taking anther fraction of a seconds worth, and so on until the entire film has been created by capturing micro-movements. This is a quicker method of animation, but can be higher in production cost, as sets have to be built and characters/objects have to be created. It can take a day to create roughly 3 seconds of footage on average, making full length films take a large amount longer to produce, but mistakes are easier to fix and therefore it overall takes a smaller amount of time.
The phase after stop motion used a similar concept, combined with the hand-drawn methodology of earlier incarnations, to create a 2D moving image on the computer using images animated using computer programs (such as flash). These 2D animations use vector movements (using the screen as a form of grid with coordinates to give the animated image a location as to where it should go) in order to move themselves, but often this cannot create any kind of pseudo-3D image without a lot of work. This resulted in this being a popular animation technique amongst hobbyists and amateurs but was rarely used in proper film.
The next big stage in animation, one that carries through to this day, is the use of 3D computer generated animation, using 3D models in order to represent characters and objects and moving them through the use of 3D vectors and waypoints. The 3D models are often placed on what is called a 'rig', which is essentially a skeleton that all parts of the model that are designed to move connect to (eyes, limbs, all bones are connected to the rig, even the different eyebrows and parts of the face are linked to the rig in different ways allowing them all to move separately). This rig is then moved using the different 'bones' that the rig consists of to create the 3D movement.
The 3D animated short film that I intend to make will be using this latest in 3D animation, using a 3D engine for the simulation of various real-world effects, such as physics, camera blur, lens flares, lighting shafts, and any of the other camera effects that happen either naturally or intentionally in normal filming. It is also very helpful for the simulation of physics, should it be required in any way for the animation. These effects can help me better simulate a real world and compare with other 3D short film animations. These programs are becoming a commonplace amongst 3D animators and amateur filmmakers due to their good simulation of effects and high quality rendering.

Programs similar to this are becoming a valuable tool for those with a smaller budget for film making, as the provide a professional finish and easy to use interface for any film maker. the engine chosen here is preferable to me above others due to its animation interface allowing forms of the many different animation types throughout history; it works through key frames/key frame positioning, acting similar to how stop motion works, but instead simulating it within a 3D environment. However, whereas each action must be made out of smaller micromanaged movements in stop motion, 3D animation uses key frames, which are set points for the computer to animate in-between, allowing smooth transitions between positions to be achieved. I will use these key frames to achieve a smooth and semi-realistic animation.
Another advantage over previous historical methods is that the 3D creative process allows for environments and sets limited by nothing but the imagination. For the majority of my sets, they will take place in a vibrant jungle, starting off at dawn and ending at dawn the next day (the final scene of the film will take place at sunset, but the last few shots of the film will be at dawn), and different camera effects will be simulated to make this look more appealing. more modern effects, such as lens flares, god-rays and complex shading (to give a real shadow effect), combined with edge-detection to smooth things out with extra shading.
Programs like these are a very important in the process of 3D animation and are a huge help in reducing the amount of workload that an animator has to do, as the methods of smoothing in between different key frames are easy to change, from sudden movements and jerks to smooth says and x-y-z-coordinate curving, which gives the effect of two key frame positions blending together. This blending is often used for the movement of organic entities, such as people, trees and flowers. Having a 'flat' movement between two keyframes means that the movement will look jerky and stiff, better suited for mechanical entities such as robots, cranes and other industrial-themed objects. motion-based entities, for instance a car, would use a combination of the two to make it seem as though it were realistically driving along.
3D animation programs such as this allow for another method of animation that the others didn't; particle systems. While individual weather effects and various other special effects (explosions, beams, snow etc.) would have to be either drawn on or hand edited until it was absolutely perfect manually, particle systems allow effects such as this to be made within minutes, and are one of the biggest revolutions in effects within a 3D space. They can be used for almost anything, such as winds, snow, rain, water splashes, and can even be used to create effects on the ground, such as snow settling in the exact place a snowflake fell, giving it a more realistic effect. Particle systems can also have a generated number of world-related physics, such as wind, gravity and force. This can be helpful when creating a snowstorm, for example, as the snow would be fluttering around in the wind, while also being pulled down by gravity.
The first form of animation was the basic flip book, which uses the same concepts as later techniques (such as the cell-based method, which is a more advanced and technical form of the basic flip book concept) but is a more primitive approach to animation and moving image. it uses a form of optical illusion to give the impression of an object moving on the page and being animated, but in reality it is different 'cells' that have been drawn on different pages, and are being moved through with the speed needed to trick the eye into not seeing the individual frames, and instead only viewing the animated image.
Initially, animation in film was hand drawn frame by frame and then the frames were played back to back in order to appear as though they were a moving image. This resulted in a very lengthily production cycle as the entire scene had to be redrawn every single frame, and if one mistake was made the frame would have to be redrawn all over again. However, this did allow for standard films to have animation in them, as the regular footage could be drawn on with the added bonus of not having to draw the background on every frame, reducing the production cycle dramatically.
The next large step in the production of animation was stop motion, which involved taking a fraction of a second's worth of film (essentially an image) of the scene, then moving the character/objects/subject the slightest bit, then taking anther fraction of a seconds worth, and so on until the entire film has been created by capturing micro-movements. This is a quicker method of animation, but can be higher in production cost, as sets have to be built and characters/objects have to be created. It can take a day to create roughly 3 seconds of footage on average, making full length films take a large amount longer to produce, but mistakes are easier to fix and therefore it overall takes a smaller amount of time.
The phase after stop motion used a similar concept, combined with the hand-drawn methodology of earlier incarnations, to create a 2D moving image on the computer using images animated using computer programs (such as flash). These 2D animations use vector movements (using the screen as a form of grid with coordinates to give the animated image a location as to where it should go) in order to move themselves, but often this cannot create any kind of pseudo-3D image without a lot of work. This resulted in this being a popular animation technique amongst hobbyists and amateurs but was rarely used in proper film.
The next big stage in animation, one that carries through to this day, is the use of 3D computer generated animation, using 3D models in order to represent characters and objects and moving them through the use of 3D vectors and waypoints. The 3D models are often placed on what is called a 'rig', which is essentially a skeleton that all parts of the model that are designed to move connect to (eyes, limbs, all bones are connected to the rig, even the different eyebrows and parts of the face are linked to the rig in different ways allowing them all to move separately). This rig is then moved using the different 'bones' that the rig consists of to create the 3D movement.
The 3D animated short film that I intend to make will be using this latest in 3D animation, using a 3D engine for the simulation of various real-world effects, such as physics, camera blur, lens flares, lighting shafts, and any of the other camera effects that happen either naturally or intentionally in normal filming. It is also very helpful for the simulation of physics, should it be required in any way for the animation. These effects can help me better simulate a real world and compare with other 3D short film animations. These programs are becoming a commonplace amongst 3D animators and amateur filmmakers due to their good simulation of effects and high quality rendering.
The interface of the program that I will be using, commonly applied for professional 3D animated films
Programs similar to this are becoming a valuable tool for those with a smaller budget for film making, as the provide a professional finish and easy to use interface for any film maker. the engine chosen here is preferable to me above others due to its animation interface allowing forms of the many different animation types throughout history; it works through key frames/key frame positioning, acting similar to how stop motion works, but instead simulating it within a 3D environment. However, whereas each action must be made out of smaller micromanaged movements in stop motion, 3D animation uses key frames, which are set points for the computer to animate in-between, allowing smooth transitions between positions to be achieved. I will use these key frames to achieve a smooth and semi-realistic animation.
Another advantage over previous historical methods is that the 3D creative process allows for environments and sets limited by nothing but the imagination. For the majority of my sets, they will take place in a vibrant jungle, starting off at dawn and ending at dawn the next day (the final scene of the film will take place at sunset, but the last few shots of the film will be at dawn), and different camera effects will be simulated to make this look more appealing. more modern effects, such as lens flares, god-rays and complex shading (to give a real shadow effect), combined with edge-detection to smooth things out with extra shading.
Programs like these are a very important in the process of 3D animation and are a huge help in reducing the amount of workload that an animator has to do, as the methods of smoothing in between different key frames are easy to change, from sudden movements and jerks to smooth says and x-y-z-coordinate curving, which gives the effect of two key frame positions blending together. This blending is often used for the movement of organic entities, such as people, trees and flowers. Having a 'flat' movement between two keyframes means that the movement will look jerky and stiff, better suited for mechanical entities such as robots, cranes and other industrial-themed objects. motion-based entities, for instance a car, would use a combination of the two to make it seem as though it were realistically driving along.
3D animation programs such as this allow for another method of animation that the others didn't; particle systems. While individual weather effects and various other special effects (explosions, beams, snow etc.) would have to be either drawn on or hand edited until it was absolutely perfect manually, particle systems allow effects such as this to be made within minutes, and are one of the biggest revolutions in effects within a 3D space. They can be used for almost anything, such as winds, snow, rain, water splashes, and can even be used to create effects on the ground, such as snow settling in the exact place a snowflake fell, giving it a more realistic effect. Particle systems can also have a generated number of world-related physics, such as wind, gravity and force. This can be helpful when creating a snowstorm, for example, as the snow would be fluttering around in the wind, while also being pulled down by gravity.
Sunday, 27 September 2015
Finished Metal Base
After the rust layer was applied, a Scratched metal texture was painted on. this helps give the model more depth as oppose to just having a metal texture, due to what it helps connote to the audience; that these robots are old and withered, and have not been serviced in a long time. Hopefully when colour is applied (in the form of a transparent colouring to all of the non-rusty areas) not too much detail will get lost.


Saturday, 26 September 2015
Finished Rust
I have finished the layer of rust that will be the base for the texture of my protagonist. This will then receive a layer of a scratched metal texture, which will them be covered with a brushed metal texture, both made within Photoshop. Once this has been done, the robot's colour and details will be painted on, which will differ for each robot.


Friday, 25 September 2015
Texturing the Protagonist
Now that the model is finished, I can begin the unwrapping process. Unwrapping the model is basically creating a net like in mathematics; a map of all the model's faces so that they fit into a 2D plane. This is called unwrapping because you basically unwrap the model until it is flat, allowing you to draw on it using your program of choice (usually Photoshop), but I am using a newer technique I've learned with involved basically painting a pre-made image (called a texture) onto the model and then painting different textures onto the model in layers to achieve the desired effect.
As I want my robots to appear as though they are very old and have been going a long time, I have started out by painting the entire model with a layer of rust, which will be an undercoat of the whole model. Once I have finished this, I will paint a silver scratched metal texture over most of the parts, leaving rust on the edges and in the corners where paint would have chipped off and rust would have formed. A layer colour will then be painted (4 different versions, one for each colour of robot) and then some final details will be applied, such as warning stickers, wires and other small effects.


As I want my robots to appear as though they are very old and have been going a long time, I have started out by painting the entire model with a layer of rust, which will be an undercoat of the whole model. Once I have finished this, I will paint a silver scratched metal texture over most of the parts, leaving rust on the edges and in the corners where paint would have chipped off and rust would have formed. A layer colour will then be painted (4 different versions, one for each colour of robot) and then some final details will be applied, such as warning stickers, wires and other small effects.


Thursday, 24 September 2015
Front & Arm Done, Model Finished!
The front of the robot, as well as the arm, are now completely finished! This ends the modelling phase of this character, and he will now go on to be textured. The front door is hinged at the bottom allowing it to open, and the arm can now be extended out further, as well as made longer.


Wednesday, 23 September 2015
Finished Underside and Wheels
The wheels and underside have been completely finished now, and allow for the full range of movement needed for the short film. There is not much left to model now besides the front of the bot, and maybe placing a few different details here and there. Please note that the wheel, as with the eye, only needs to be modelled once as it will be duplicated for all of the other positions it is required to be in.


Tuesday, 22 September 2015
More modelling!
I have competed more of the model, specifically the arm! It needs some more work in order to give it the ability to extend like I want it to, but it's basically done.


Monday, 21 September 2015
Modelling The Protagonists
I have begun modelling the robotic protagonists of my film. So far, I have completed the basic body shape, the back fan (which was not shown in my concept sketches but helps to add to the character as the back looks less plain) and the eye, with eyelids and ball joint. So far it looks very basic, but detail will be added as the modelling process goes on and when texturing begins. The joint for the wheels has been completed, but as it will not be seen for the large amount of shots not much detail is required for it.


Sunday, 20 September 2015
Inspirations for this Project
As this is all going to be hand made, and nothing will be 'off the shelf' (like props would likely be in a live action short film), everything has to be explicitly designed and created with purpose. For this film, I had gone through many different ideas and story concepts, ranging from aliens dropping robots form the sky to huge robots invading and discovering their emotions, but in the end all of these ideas fell sort on one thing; they don't really have anything unique about them. They are all fairly generic ideas that don't allow for much creative freedom, and have been done a thousand times in different sci-fi media.
While the idea that I have settled on has likely been done before, I like it and think it fits well with the characters that have been thought about. The idea of the robots being incredibly small was inspired by a film that released earlier this year, Ant-man. I loved the way that the cinematography conveyed size and how everything was represented and shown from a smaller perspective, as well as they way that normal everyday objects take on a new meaning when seen from a smaller angle, for instance when a tap turning on is shown as being similar to a tsunami. or when small distances are gigantic chasms.
This idea of scale is a central point in the story I have written; the small group of robots, our protagonists, are looking for any items of value to them that can give them energy, as they have nearly run out. when one of them comes across an enormous power canister (a Duracell AA battery) easily 5 times the size of any of them, they are ecstatic at their discovery. this is all about the relative perspective, as to us the battery is tiny and can't keep a torch on for longer then 5 minutes without running out, to them it is huge and contains vast amounts of power that they so desperately need, and will keep them going for years. This sense of scale is what I will try to convey throughout my short film.
The designs of the robots themselves have been inspired by multiple different works of science fiction, ranging from newer entries to the genre such as Wall-E to older more classic designs like Daleks. I have even looked at some designs from other forms of medias such as the characters of Wheatly and GLaDOS from Portal or E-102 Gamma. As these inspirations are heavily CGI-based, it has helped massively when designing methods of them conveying emotions and expressions, as seeing how professionals have created workarounds for them is interesting to discover. For instance, in almost every scene involving Wall-E, there is a shot of him bending in a way in which physically doesn't make sense. This has showed me that as long as it is designed properly and disguised well, the rules of weather these robots could physically exist and work as they do are bendable to an extent. This allowed me more creative freedom when designing my characters.
Wednesday, 16 September 2015
Designing and Refining My Protagonist Characters
While I have figured out the basics of my storyline, I will likely be making changes before I write the final script and will post about it then. However, it is definite that the story will revolve around a small team of 4 differently coloured robots (to allow them to be told apart easily) but will all use the same basic model that will be textured differently to save on time as well as allowing them to use the same basic rules for displaying emotion and character. Therefore, only one of them needs to be designed. There will in fact be another kind of robot, but he has yet to be designed. So far, I have been through a number of different designs before settling on the final one, but the basic concept remains the same; a group of tiny robots that can be folded up into small boxes. (please also note that the two sad foods in the bottom right are part of the design of my notebook and are not relevant to my designs)

First Design
The basic concept if these robots being small was the starting point of these designs, and originally I did not plan for them to fold up at all. As shown in the first design (I have labelled the different designs Mark 1 - 3 (shortened to MK to to lack of space) to allow for easier telling of the separate designs). In this first design, the idea was that he would have long arms allowing for a large range of mobility and movement, allowing him to hold objects in a way that would not block his face or eyes. He had a flash light on his front for any scenes that were too dark to be lit up logically. He also had tracks that allowed him to traverse terrain, allowing for better range of freedom with the environment design (flowers have been drawn for scale before the heights were listed, so in the other designs these details are absent due to them not being needed).
The Design's Flaws
The issue with this design is that it was far too large and bulky, and it was hard to convey the concept of the robot being incredibly tiny (heights listed next to the front on views of the designs) with such bulk,. and it therefore didn't work. in addition to this, it made it hard for him to convey emotion because he did not have enough points of movement (basically none besides his arms and the tracks). the exhausts on his body also made him look to powerful and strong for my liking, and did not look as though a team of them would be required for performing tasks. the largest issue however was the arms, as they were far too long and ad a set length that couldn't be changed. this made them get in the way as they had nowhere to go when they weren't being used and would easily compromise a scene.
Second Design
For the second design, it was decided that The robot needed much more range of movement in order to convey emotion, along with the need for it to be less bulky in order to look as though the group had to work together and relied on each other. this design therefore folded up into a box with a storage space in his front through two doors that would lead to some storage shelves. the arms would fold up into the sides allowing them to be put away and the tracks were moved to the inside of the bottom, where the robot could elevate and descend on them to better convey character. This version still had a flash light, but it was much smaller and was in the top right of the front panel. It was also decided that they should have a number on the side to imply that they were once part of something bigger, but now are the only ones left.
The Design's Flaws
This design is largely close to the final one, but it does still have major differences. The biggest issue was once again the arms, but this time the opposite issue occurred. in order for them to fold onto the body while looking natural, they had to be a certain length. This has resulted in the arms being basically useless, as they cannot reach anything. While this does help connote the idea that they need to work in a group to accomplish tasks, it conveys this point too well, to the point where no tasks could be accomplished, at all, despite how many there are. The other issue is the storage doors on the front, which look out of place, and serve no real purpose to the story, making them pretty useless as well. The final issue is that the robot, while having better range of movement, is still fairly solid and cannot really convey any character due to it's fixed unblinking eyes and unmoving body.
Final Design
The final design, while it may not look much different, actually has a large amount of refinements over the other designs. The tracks have been replaced by wheels with tires and their frame has been changed, the arms have been altered to fit better with the body while allowing more movement, the storage shelf has been changed to act as a mouth of sorts should it be required to show shock or awe, but by far the biggest change is the smallest in size; the robot now has eye movement and eyelids! I am happy about this because it is something I was working on but couldn't quite figure out a way to add in without it looking unnatural. The eyes move on a ball pivot allowing the robot to look around without moving his entire body, and two semi-circular metal covers have been added to the eyepiece, acting as the eyelids, with pivots on the side.
However, due to the eyes being on a ball pivot, they can be rotated to act as eyebrows to convey both anger and sadness, along with other emotions. The arms now also extend, allowing the robot to carry things which he previously couldn't, however they still do not look strong and are relatively thin, making them look like they need help from the other robots to accomplish tasks. The new bottom frame for the wheels allows a better range of movement then just up and down, going forward, backward and side to side, allowing him to lean around corners and look over ledges, as well as tilt back to look at higher up objects.
Final Thoughts
I am pleased with this design and will begin working on the model for it as soon as I can. while there may be subtle changes due to the model just not working in ways that I may nor have foreseen, hopefully the basic design will remain relatively unaltered. I am looking forward to this creation as I cannot wait to have a play around with the range of emotion that this design should offer!
Monday, 14 September 2015
A2 Media Short Film
For my product for coursework this year, I have decided to do something that is more of my tastes and interests. At GCSE level Media Production, I had to make a short film, and decided to experiment with the usage of CGI at a basic level. As we had to make a short film revolving around zombies and our cast was limited, I suggested the idea of adding computer generated zombies that I would make at home, and then add them in through green screen when editing. This idea was good in theory, but at the time I had neither the experience nor the skill to create anything lifelike and it only ended up looking ok. However, I was nominated for an award from the school for creative usage of technology.
In my next year of GCSEs, for Film Studies, I again had to make a short film, this time with horror themes. As I had more experience using my modelling software and animation programs, I decided that it would be a better idea to reverse the original concept; instead of putting CGI images into real life, I planned to put real actors into a CGI world (in this case, a space ship) and film them against a green screen. This idea worked a lot better and produced a large amount more realistic scenes. However, the issue with this was no longer realism, as for it wasn't perfect, it wasn't bad with the exception of some green screen errors. The issue this time was the organisation of actors, the quality of the actors themselves and the strength of the plot, which resulted in the short film being more of a technological demonstration as oppose to being a good short film. Nevertheless, it won a Best Video Product award at my college's media awards night.
This time, I have refined the idea from the feedback that I have received from these two products; the CGI is good and it's use is imaginative and creative, but the physical side of it (the actors, props, etc.) were lacking at best. Therefore, the short film that I am making this year will be completely computer generated, as I now have a job revolving around modelling and animating, as well as creating realistic 3D environments, the final product should be of a much higher standard then any of my previous efforts.
For creating the models and model texturing, I will be using the free 3D modelling program Blender, smaller more specific textures and other extras will be created using Photoshop. The larger amount of filming and environment creation will be done through Unity 3D, a game engine that I have over 6 years experience using and now use professionally for my job. This experience should allow me to create a good looking animation for my short film.
The short film will be styled in a cartoon-esque format, with some exaggerated movements and such allowing for a better display of emotion and character. Along with this, my actors will all be robots as they are easier to animate while having still look good, as well as allowing for a large amount of creative freedom with designs. When designing my characters, I will attempt to put in place methods of displaying emotion within the robots that will allow me to better show the characters in a more believable and descriptive manner.
Saturday, 12 September 2015
Short Film Brief
A
short film in its entirety, lasting approximately five minutes, which may be
live action or animated or a combination of both, together with two of the
following three options:
•a poster for the film
•a radio trailer for the film
•a film magazine review page
featuring the film
The brief that I have chosen to do is the short film brief. Out of the three additional options, I am choosing to do a poster for the short film, along with a radio trailer. This brief also offers me the opportunity to Improve upon past efforts at computer generated imagery, but this time I am hoping to base the entire film around CGI rather then having elements cross with real footage (like previous videos).
Saturday, 20 June 2015
Analysing a music video
This is an example of a chosen music video suggested by our teacher Tim that as a group of me, India and Sophie can use to analyse, looking at introduction, genre, setting, costume, props, body language & movement and narrative, and then reflection upon them in the final section.
Introduction
Throughout the music video, the themes of sexism and gender
roles within most conventional country videos is pivotal, and the story of the
video hinges on the effect of those gender roles being reversed, such as the
clothing and style of female country singers and actresses being applied to the
male actors in the videos. This involves dressing them in the same stereotypical
clothing as is usually worn by the females, such as crop tops, short shorts and
other skimpy outfits. This gives a strong impact to the role reversal effect
that this video presents.
Genre
The genre of music is country, but it is unconventional for
its genre as it is mocking the country music genre for its sexism and
unnecessary over sexualisation of women, and demonstrates how ridiculous those
gender rules and conventions actually are. This breaks the usual conventions of
a country music video by exposing the sexist themes and attempting to show how absurd
the gender roles shown in this genre are and how they should be abolished.
However, while it is mocking the genre for its usual sexist
tones, it too conforms to a large amount of the usual country music conventions.
An example of this would be the way in which women are treated at the start of
the video, being catcalled and objectified by the men who are sitting on the
back of the truck. They are shown to do this likely due to the clothing, and
therefore when the roles are reversed the major visual change is the clothing
to help the audience associate this with the way females are treat
Setting
Through the video, almost all settings presented in frame
are conventional of music videos in the country genre, taking place mainly on farms
that are littered with various other country-conventional set pieces such as
pick-up trucks, hay bales and barbeques. This all helps give the video an
authentic country song look, which further helps to tell the narrative of the
video and conveys the genre.
Through the various settings used, the audience is made to
believe at the start that it is just another normal and conventional country
music video, which continues to hold up during the not-so-normal scenes during
which the gender roles are reversed. This therefore makes effective use of the
surroundings given by using the setting to not only demonstrate the genre from
the start and first few opening shots, but to maintain that look throughout the
entire video. This helps the video stay conventional to the genre while still
allowing room for the gender role challenging to be placed.
Costume
During the entire video, costume plays one of the most pivotal
parts in the telling of the narrative in the whole music video. Through the
costume, gender roles are associated and represented with crop-tops, short
shorts and dungarees, with straw sun hats. Representing the women in the music video
through this manner allows for a better representation of the roles being
reversed when the men are walking dressed in the same type of clothing in the
same style.
This stereotype is further explored when throughout a large
amount of the video the lead singers are shown in non-conventional clothes that
are less exposing then the conventional ones – long sleeved tops, jeans and
large boots that cover a lot of their legs. This is unconventional due to the
large amount of skin that is usually being exposed being covered up, therefore associating
that with them breaking free of their designated gender roles and dressing as
they like in a manner that suits their own needs and wants. This also furthers
the uncomfortable look of the men in the conventional female outfits, as it
shows them as the literal opposite of how the females have chosen to dress, as
they look very uncomfortable and unnatural in them.
Props
Jewellery is used to convey the
character of the girls, being very girly; they are wearing lots of accessories
to show how they care about their appearance and want to portray themselves in
a ladylike manner. The jewellery also convey the characteristic of the
girls as if it was black, chunky accessories you would stereotype the girls as
‘Goths’ and maybe unapproachable. Shallow depth of field is used at the
beginning of the video to blur the background, making the girls the main focus
where you then focus on what they are wearing, being light colours, and what
they are holding; a guitar, this shows the acoustic instruments and convey the
genre. The wallpaper of the room is pink, following the stereotype of a
girl having pink as a favourite colour as it’s girly. The men have cowboy
hats/straw hats to also represent the genre. Typical connotations of
Country are wearing cowboy hats, checked shirts, white t-shirts under, cowboy
boots. Specific props are used in the mise-en-scene to create the correct
ideology for the genre.
Body
Language & Movement
At the beginning of the video feature
girls in a group which is very stereotypical of the gender, as girls are very
reliant on each other, and often do everything together. There are more
than one groups suggesting characteristics of girls and how they can be quite
gossipy about other girls out of jealousy. One of the girls is leaned
over the motorbike, in eye view of the men which is quite provocative behaviour
suggesting how women are sexual objects. A girl to the left also looks at
her nails while talking, conveying the cliché stereotype of being girly and
more interested in themselves and appearance than conversation. In
contrast, two girls at the back are throwing a ball, although they are wearing
different clothing to the other girls as they are more covered up.
They are at the back also conveying how girls who don’t follow the girly stereotype of being interested in their appearance, and nails and don’t partake in sport get less attention paid to again suggesting how women are sexual objects. This is also suggested by how one of the singers, Tae is fiddling with her pen to her cheek representing her not focusing trying to be in a seductive manner. In contrast, the guys are represented in a ‘laddish’ way, as they are in a group and nudge each other to look at how attractive the girls look; another stereotype of male gender is how they only care about girls.
They are at the back also conveying how girls who don’t follow the girly stereotype of being interested in their appearance, and nails and don’t partake in sport get less attention paid to again suggesting how women are sexual objects. This is also suggested by how one of the singers, Tae is fiddling with her pen to her cheek representing her not focusing trying to be in a seductive manner. In contrast, the guys are represented in a ‘laddish’ way, as they are in a group and nudge each other to look at how attractive the girls look; another stereotype of male gender is how they only care about girls.
Narrative
This music video presents typical
stereotypes of gender roles, presenting the girls with long wavy blonde hair,
with makeup in little clothing representing how they’re a sexual object and
attractive. The women are the ones singing, women are preferably more
linguistic than men; another stereotype of a girl is that they are dramatic and
are centre of attention which is represented in this music video, also
represented by the name of the song ‘Girl In A Country Song’.
They have pink lipstick and eye shadow another
typical stereotype of a girl is how they are girly, which wearing pink lipstick
and eyeshadow conveys, this is also conveyed through the use of the pink pen
used; the props used help to create the narrative. A sign is shown
reading ‘Role reversal’ to help the audience to understand the narrative of the
video. This is followed by the camera tilting upwards showing men wearing
little clothing walking seductively towards the camera mimicking the stereotype
of girls to create humour and entertain the audience.
Reflection
By analysing ‘Girl in a Country Song’
by Maddie and Tae with Taylor Swift’s ‘You Belong With Me, it has helped me
understand typical generic conventions within the specific genre,
country. I have come to a general conclusion that the people look
similar, particularly focusing on makeup used; Taylor Swift uses very subtle
makeup, where as if it was a rock video she might have really heavy dark eye
makeup conveying more of a heavy genre.
She has blonde wavy hair, mirroring
‘Girl In A Country Song’ blonde is a very subtle, light colour conveying the
lightness and subtle use of instruments in Country, often using acoustic
guitar. Taylor Swift in her music video is supposed to be the girl who is
unnoticed in comparison to another girl, her subtle coloured hair I have learnt
that the props, body language and movement should all connote a meaning
connected to the actual song, the narrative also helps massively to help the
audience to understand the meaning of the song.
Thursday, 18 June 2015
Tuesday, 16 June 2015
Original Footage & How We Made the Film
 I used a Sony CX250 to record the 44 bus route which went to Willerby. This was convenient as it was my journey home. The quality of the camera wasn't great, although it was HD quality, this did not impact the quality of the footage though as it doesn't need to focus on specific features, just recording a journey. As there would be different colours edited in to the footage also, this would draw away any attention from the quality of the recording.
The weather was really sunny, therefore reflecting the camera lens on to the window, this was a problem as when editing the footage, the lens flare could not be edited out; on the Wolf Alice 'Bros' video, there is no lens reflection.
The journey was approximately 20 mins travelling 3.3 miles, we then sped it up by about x4 in order to make the footage about the same time as the original music video, this shortens the journey massively.
This is a handheld tracking shot, this could convey chaos and a fun, spontaneous, outgoing atmosphere following the alternative rock genre of Wolf Alice. Therefore I replicated this shot and didn't move.
The bus stops every 2 minutes which represents a natural setting, as it's a real-life bus journey, the cars travelling by and people walking past also creates this.
Subscribe to:
Posts (Atom)